How I Changed my Alienware 17 R4’s battery and CPU fan
written by Babatunde Oladogba
This story is about my experience using Alienware laptops over the years and how I fixed the PC myself when it was going to break down.
Even though my academic background is rooted in architecture, my love for technology is one of the reasons I’m inquisitive. My journey with Alienware started far back in 2016. My first Alienware was an R3 17-inch. It served its purpose until 2017, before I decided to buy R4. The Alienware R4 would go on to be my beloved PC and one of Alienware’s most insane PCs ever built. Perhaps now outdated 🙄
With my inquisitive nature, I would break open my PC, first in 2018 and for the second & third time in 2020.
The first time I had to open my Alienware was in late 2018.
At the time, the laptop went off while I was using it. And that would be my first time experiencing such a problem since I bought it brand new.
I then realized that the problem was from the battery. And for the PC to function effectively, I had to order a new battery.
At the time, I didn’t think of taking it to an engineer to fix it, as I believed I could fix it myself. Albeit, this wasn’t going to be my first time fixing a gadget. I already knew how to deal with electronics over the year. So, I practically knew what I was doing. And to fix the problem, I bought a new battery and tools that I could use to untighten the PC. I then proceeded to youtube and watched a few videos. This youtube tutorial was helpful – New Alienware 17 R4 / 15 R3 Disassembly + Repaste Teardown.
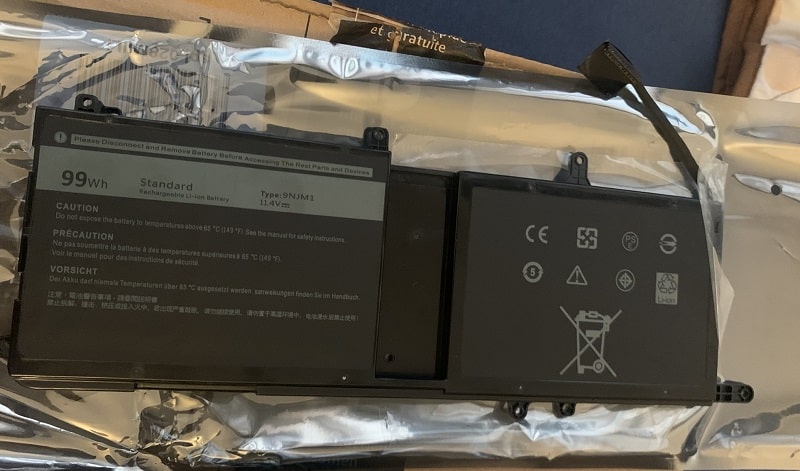
In addition, I read some articles on how to change Alienware 17 r4 battery. Alienware 17 R4 uses a 99Wh, 11.4V, standard Li-ion battery, type:9NJM1. The battery looks like the image below.
I was curious, even though I had educated myself enough on how to get into the inner part of the PC. I was curious mainly because access to the battery is not like any other PC. R4 is a well-compacted PC.
How do I access the brain of a fully compacted Alienware R4 without breaking the PC? I questioned myself as I embarked on a journey that seemed impossible.
After all, I wasn’t insane. It was a matter of risk, and I believed I knew what I was doing. I went ahead and successfully changed the battery.
I would enjoy this success until the summer of 2020.
By July 2020, the PC again went off while I was using it!
At first, I was confused, as I didn’t know what happened.
Since the laptop was not connected to the power source, I thought the battery ran out of power. Before plugging in the power cable. I powered the PC but got no response, I checked the 240V AC power supply charger to see if it was working; and yes, the charger was working within the normal temperature. I plugged in the charger and then powered the PC. To my surprise, the PC came up with a message similar to this “the battery is permanently damaged and needs to be replaced”.
What just happened? I asked myself! I had changed the PC battery in late 2018, so it was bizarre to see that message.
The laptop wasn’t a used laptop, It was brand new. I wondered why the battery couldn’t live up to expectations. I take very good care of my PC and there was no way it could have been from poor usage. In fact, the laptop is properly kept.
But I had one thought,
If it’s not a design problem, then it is systemic.
How did the battery become dead without prior notice? Many questions ran through my mind and to answer those questions, I went to the mighty search engine, Google.
However, the reports from Google about the issue were disappointing. Apparently, many users had reported similar issues. It didn’t make any sense to me that I have to change the battery twice within two years.
I tried other hacks to see if I could fix the problem. I performed a battery test and also tried other options, but all efforts proved abortive.
The battery had become dead. Still, it didn’t make any sense to me.
Since the computer won’t work without being connected to the AC adapter, there were two options left for me; continue using the PC with the dead battery or order a new one.
I went with the option of using the laptop with the dead battery for some time till I get a new one. Even though that was dangerous, I took precautions every time I was using it.
I would continue using the PC with the dead battery until almost a month before I noticed another problem.
It was an unusual sound from the CPU fan, the noise would go on and off but I didn’t take it seriously.
Just one week after the discovery of the new problem, I opened the laptop and disconnected the battery cable from the motherboard for safety purposes.
By Early August 2020, the noise from the CPU fan had become unbearable. It wasn’t just the battery anymore; the CUP fan was clogged, thus, the unpalatable sound!
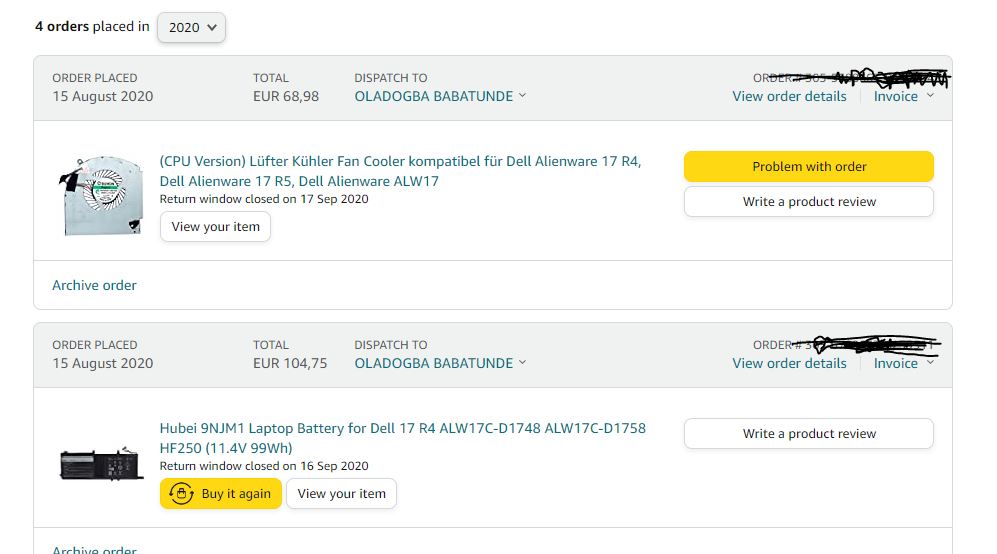
I had to make a drastic decision. Exactly on August 15th, 2020, I placed an order for the battery and CPU fan. These two would take about a week before delivery. see image below.
Even after the delivery of the new battery and CPU fan, I still continued to use the PC until August the 30th.
On Sunday afternoon, August the 30th, 2020. I opened the PC for the 3rd time because the unpalatable noise drastically increased while using the PC. The noise was now unbearable.
It wasn’t like I planned to change the fan and battery on that day, it only happened that I had no choice. Also, I had watched some videos on youtube, and one particle article on IFIXIT – Alienware 17 R4 Battery Replacement was very helpful.
But then, accessing the inner part wouldn’t be easy. Alienware R4 is a fully compacted PC and its two fans are systematically positioned underneath. Difficult to reach!!
____DISASSEMBLING
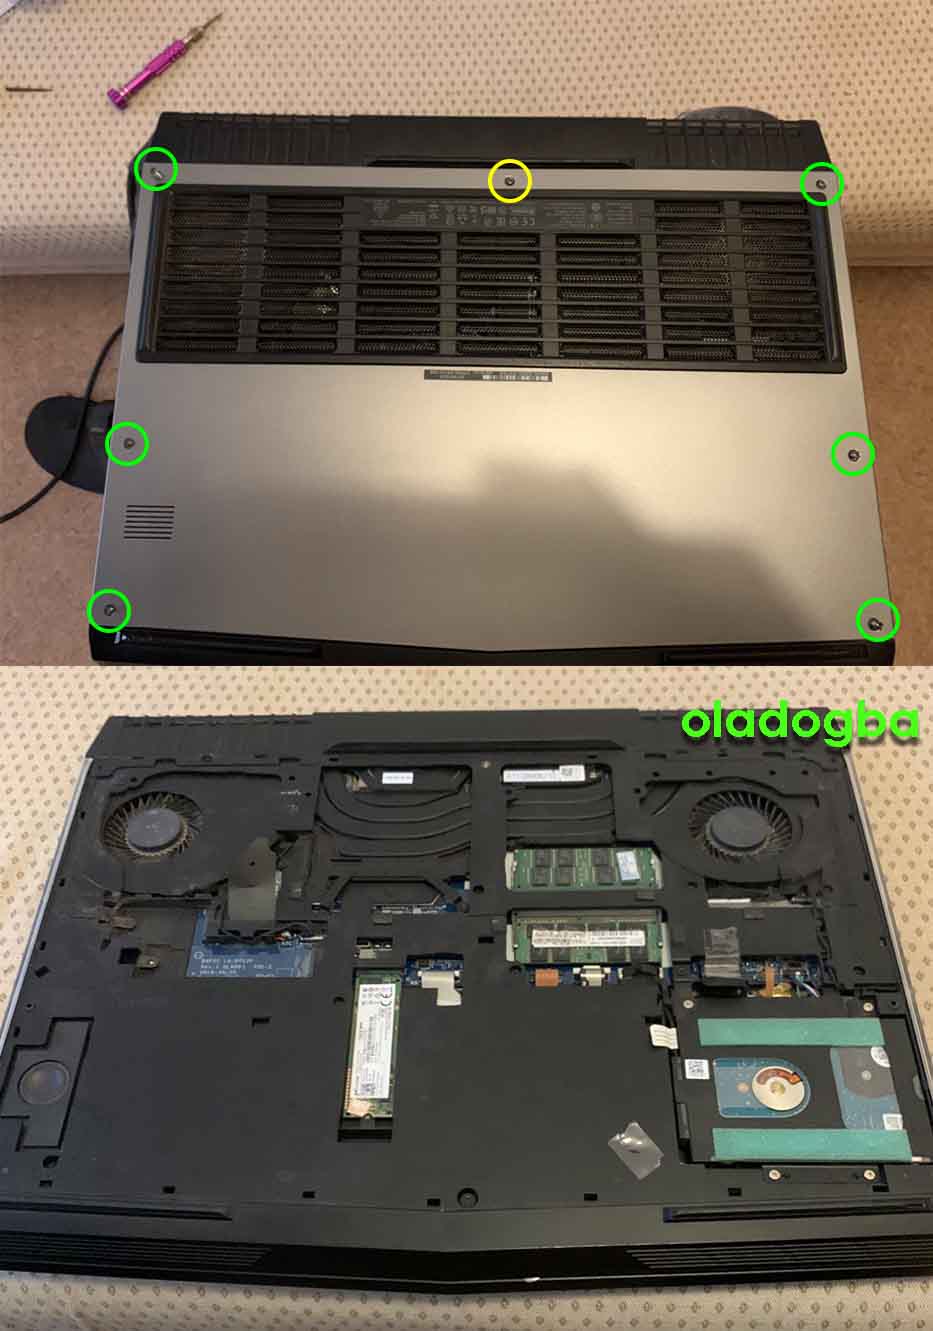
To get to the battery, First I had to take out six M2.5×13 screws (2.4 mm) on the back of the laptop and one M2x3 screw (1.9 mm) which was a little difficult to remove.
– I Detached the battery connector cable, located on the right side of the laptop, above the hard drive to prevent circuit flow.
– I removed the four M2.5×5 screws (2.4 mm) on the hard disk drive. I then detached the HDD cable from the motherboard before pulling it out.
– RAM was the next. I moved the metal sidings clips of the ram outward before gently removing the two 16GB RAM cards. 32GB ram in total.
– The next thing to remove was the Wi-Fi card. It has one M2x3 screw (1.9 mm), it wasn’t that difficult to remove but was difficult to fix back.
– In the next step, I had to unclip the two clips attached to the wi-fi card.
– SSD was next. I easily took out the 512 Solid state drive (SSD). It has one M2x3 screw (1.9 mm).
– in the next step, I took out the Fan Shroud at the rear panel. It has two M2.5×7 screws (2.44 mm). However, it was difficult to remove. This article clearly stated the steps required.
– To take out the plastic cover, I had to take out another two M2x3 screws (1.9 mm) at the top right and top left of the PC that holds the Tron lights in place.
– After that, I unplugged the Tron lights.
– The next step would require me to take out fourteen M2.5XL8′ screws (2.4 mm) located in the plastic cover, by this time I was so curious.
– After that, I had to carefully and gently lift the sides of the plastic cover. After many trials, I then slowly took out the plastic cover.
It was only after the step above I could clearly see the battery. it was very challenging until this period. see image below.
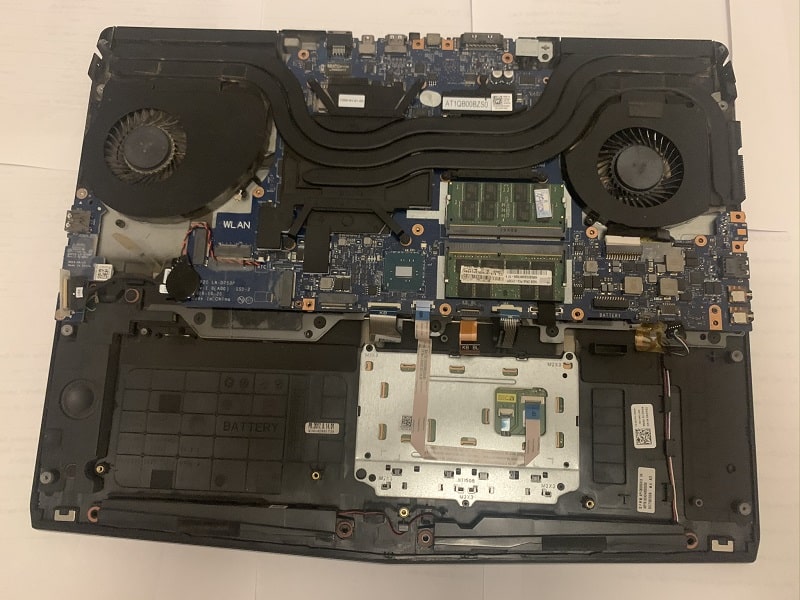
But then, there was more to do!
I needed to change the CPU fan which is the most difficult part of the task. At this point, I was curious but very careful.
– before proceeding, I took out the battery which was held by four M2.5 screws (2.4 mm), then replaced it with the new battery.
– To get to the fans, there were more steps to take.
I needed to remove the heat sink, held by six screws,
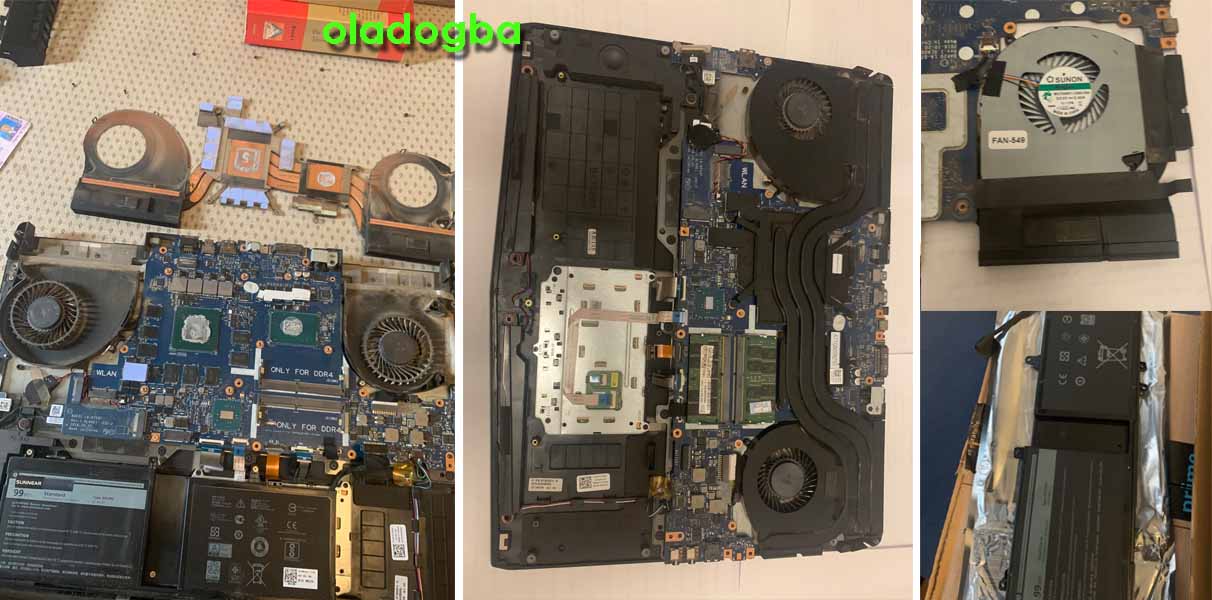
the CPU, held by one screw, and the fans cover, held to the motherboard by four screws each. Only after removing these screws, I was able to detach the heat sink from the motherboard. see image below.
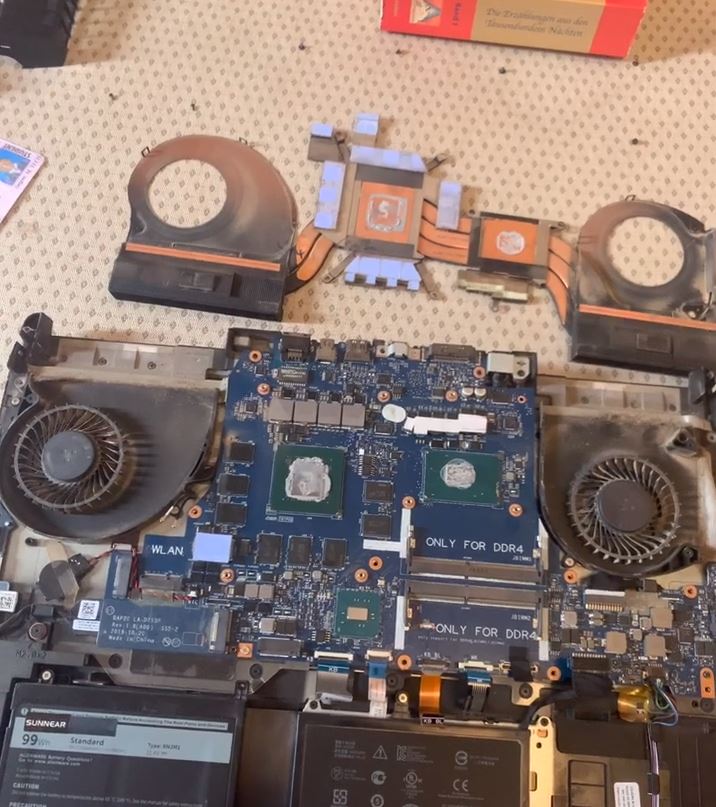
Until this time, I took intermediate short breaks rewatching the tutorials on my smartphone. I didn’t want to miss any step. I knew very well that any simple mistake would render my motherboard useless.
After a rigorous effort and 3 hours+ of work, I successfully changed the fan and re-coupled the PC.
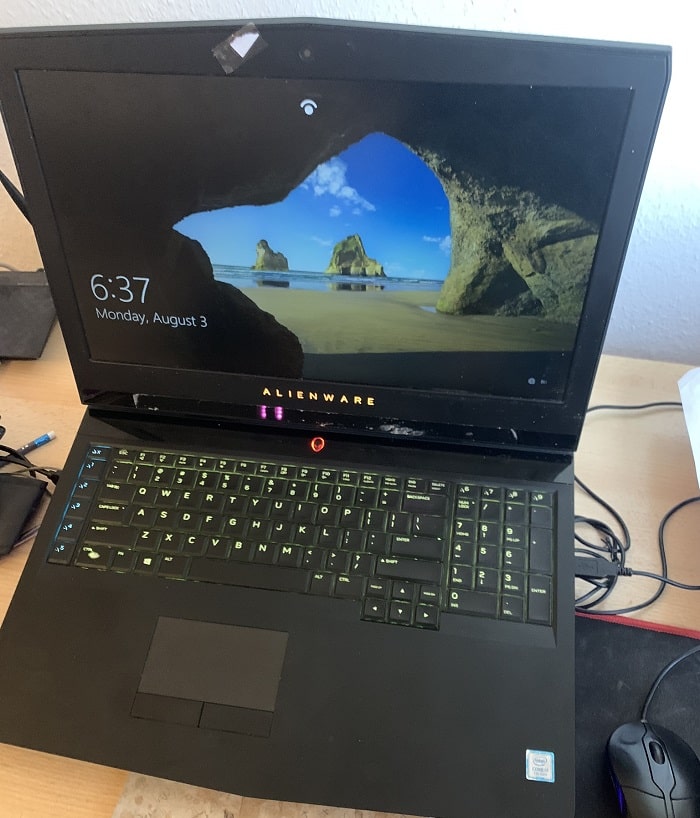
For me, it was a successful attempt, maybe it inspires someone.
However, I do not recommend that anyone should try what I did unless they are fully aware of the risk.
But do not forget the quote from William Faulkner. He wrote and I quote;
“You cannot swim for new horizons until you have courage to lose sight of the shore.”
And that of Mark;

For me, Alienware 17 R4 is undoubtedly one of the most insane laptops ever designed by Dell. You may argue otherwise
In my conclusion, I think the problem with Alienware R4 specifically couldn’t have been a design problem. It is systemic and a market strategy as I believed.
PS: my PC is still working fine.
Contact: babatunde@oladogba.com